CraftCMS, Gastby & Netlify with Live Preview! (Part 1)
Welcome to this multi-part series on building a blog using CraftCMS and Gatsby. We will cover CraftCMS & GraphQL configuration, GatsbyJs setup & configuration, discuss and implement my approach to CraftCMS Live Preview with Gatsby, and finally we will cover deploying on Netlify.
This article assumes that you are familiar with the basics of developing CraftCMS locally using Nitro (v2), deploying to production and all it's parts (hosting, domain configuration, etc), building websites using GatsbyJS and deployed them to Netlify.
Table of Contents
Part 1: Overview
Part 2: Headless CraftCMS
Part 3: Gatsby + Craft (with SEOmatic)
Part 4: Live Preview
Part 1: Project Overview
A Bit Of Background
When searching for craft cms gatsby live preview all I could find was articles and solutions for generating gatsby builds of previews. Gatsby source plugin for Craft CMS even recommend Gatsby Cloud. I even found awesome and very detailed article A Journey From Twig to Gatsby, which was a great reference while I was researching.
While Matt's solution for Live Preview is clever, the idea of running gatsby develop in a container seems a bit overkill and a bit much for smaller websites.
I decided that a "lighter" solution would be to create a Client-only Route in Gatsby that will generate the preview on the fly, using React Query to fetch the preview data from Craft's GraphQL api.
Our Craft Entry Section, in turn, would point it's Preview Target to that Client-only Route in Gatsby.
Mapping Things Out
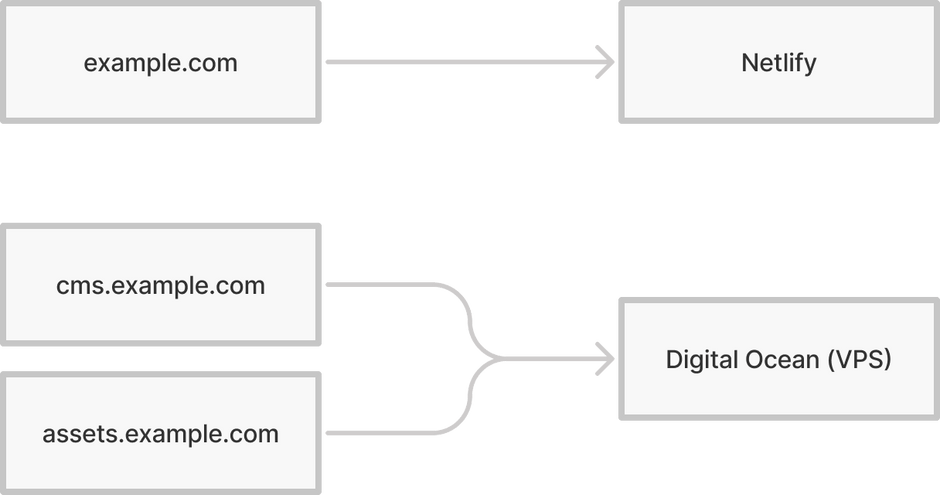
Let's outline what we will build: We will implement a simple Gatsby blog that will fetch it's posts from Craft. The Gatsby site will be built and hosted on Netlify, while the Craft CMS can be hosted on your favorite host.
For this article I deployed Craft on Digital Ocean using Laravel Forge.

example.com will be Netlify end point, serving Gatsby.
cms.example.com will be Craft's control panel's end point.
assets.example.com will be Craft's public assets url end point.
Blog Entry Model
The blog should have the following fields:
- Title: default in any channel entry
- Excerpt: plain text field
- Cover Picture: asset field, to demonstrate image transforms
- Content Blocks: matrix field, with a Rich Text block and a Picture block.
Great! Stay tune for Part 2, where we will dive deep into Craft configuration.
