CraftCMS, Gastby & Netlify with Live Preview! (Part 3)
Welcome to this multi-part series on building a blog using CraftCMS and Gatsby. We will cover CraftCMS & GraphQL configuration, GatsbyJs setup & configuration, discuss and implement my approach to CraftCMS Live Preview with Gatsby, and finally we will cover deploying on Netlify.
This article assumes that you are familiar with the basics of developing CraftCMS locally using Nitro (v2), deploying to production and all it's parts (hosting, domain configuration, etc), building websites using GatsbyJS and deployed them to Netlify.
Table of Contents
Part 1: Overview
Part 2: Headless CraftCMS
Part 3: Gatsby + Craft (with SEOmatic)
Part 4: Live Preview
Part 3: Gatsby + Craft (with SEOmatic).
In this part we will install and configure Gatsby to query Craft content.
Setup
We won't worry about aesthetics here. We will list the blog articles in the home page and have a detail page for those.
At the time of writing Gatsby was running on version 3.12.1
Let's go for a fresh install of gatsby, per their quick start:
$ npm init gatsbyAfter giving a name and a project directory, let's skip the CMS and Styling questions. The only plugins we need are gatsby-plugin-image and gatsby-plugin-react-helmet. We will also need html-react-parser to parse SEOmatic tags into React Helmet.
Once everything is install let's fire up gatsby:
$ yarn developNow let's replace the code of the home page, locate at ./src/pages/index.js, with the following:
import * as React from "react"

const IndexPage = () => {
  return (
    <main>
      <h1>Gatsby + Craft Blog</h1>
    </main>
  )
}

export default IndexPage
With that, we are ready to start!
Querying Craft's GraphQL API
Let's install and configure gatsby-source-craft:
$ yarn add gatsby-source-craft --devOnce it's finished downloading, let's add it to gatsby-config.js
  // ...
  plugins: [
    // ...
    {
      resolve: `gatsby-source-craft`,
      options: {
        typePrefix: ``,
        craftGqlToken: ``,
        craftGqlUrl: `http://headless-craft.test/api`
      }
    },
    // ...
  ]
  // ...
Note that we are setting typePrefix to empty string so we can reuse queries.
Not that we are going to query Craft's GraphQL Public Schema, which doesn't require a token.
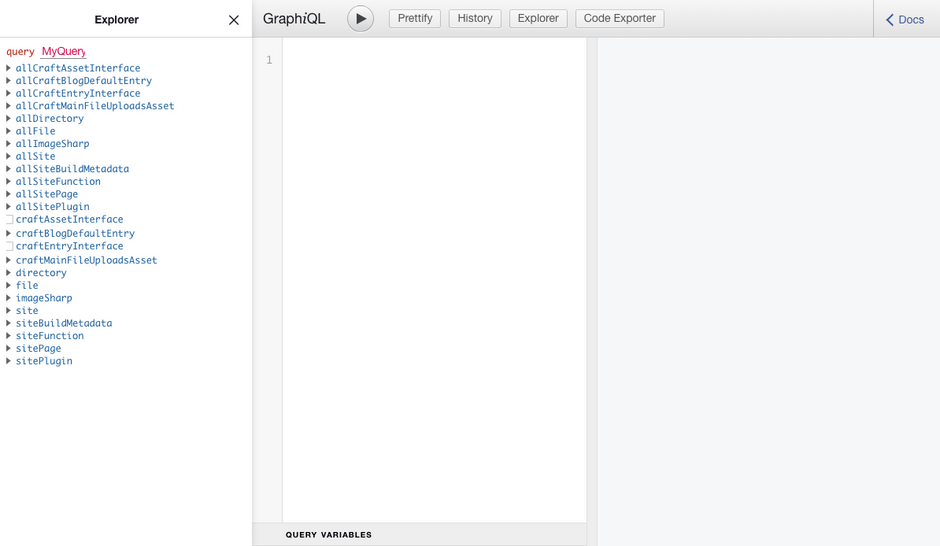
Let's run yarn develop again and check Gatsby's GraphiQL to confirm we are fetching data from Craft:

Let's run a query to test it out:
query MyQuery {
  allBlogDefaultEntry {
    nodes {
      uid
      uri
    }
  }
}
It should output:
{
  "data": {
    "allBlogDefaultEntry": {
      "nodes": [
        {
          "uid": "f5db6077-a916-435e-8eca-1955b20b0b24",
          "uri": "hello-world"
        }
      ]
    }
  },
  "extensions": {}
}
If everything checks out, it's time to start creating the pages!
Creating Blog Pages
Let's create the gatsby-node.js file at the root of our project and add the following code:
const path = require(`path`)

exports.createPages = async ({ graphql, actions }) => {
  const { createPage } = actions

  // Get all blog posts
  const result = await graphql(`
    query BlogEntriesQuery {
      entries: allBlogDefaultEntry {
        nodes {
          uid
          uri
          title

          seomatic {
            ... on SeomaticType {
              metaTitleContainer
              metaTagContainer
              metaLinkContainer
              metaJsonLdContainer
            }
          }
        }
      }
    }
  `)

  if (result.errors) {
    throw result.errors
  }

  const { entries } = result.data

  // Create a page for each blog entry and
  // pass the entry to the page context.
  entries.nodes.forEach(entry => createPage({
    path: entry.uri,
    component: path.resolve('./src/templates/post.js'),
    context: { post: entry }
  }))
}
And let's create ./src/templates/post.js file with the following code:
import React from "react"
import { Link } from "gatsby"
import { Helmet } from 'react-helmet'
import parse from "html-react-parser"

const Post = ({ pageContext }) => {
  const { post } = pageContext
  return (
    <main>
      { post && post.seomatic && (
        <Helmet>
          {parse(post.seomatic.metaTitleContainer)}
          {parse(post.seomatic.metaJsonLdContainer)}
          {parse(post.seomatic.metaLinkContainer)}
          {parse(post.seomatic.metaTagContainer)}
        </Helmet>
      )}
      <Link to="/">
        <h3>Gatsby + Craft Blog</h3>
      </Link>
      <h1>{post.title}</h1>
    </main>
  )
}

export default Post
At this point this is pretty much Gatsby standard way of creating pages. We query data from a source, which in our case is provided by Craft through gatsby-source-craft, and we use Gatsby's createPages API to pass data to component using pageContext prop.
html-react-parser + React Helmet + SEOmatic is a match made in heaven.
Last thing to do is to add the list of articles to the home page:
import * as React from "react"
import { graphql, Link } from "gatsby"
import { Helmet } from "react-helmet"
import parse from "html-react-parser"

export const query = graphql`
  query HomeQuery {
    posts: allBlogDefaultEntry {
      nodes {
        uid
        uri
        title
        excerpt
      }
    }
    home: homePageHomePageEntry {
      seomatic {
        ... on SeomaticType {
          metaTitleContainer
          metaTagContainer
          metaLinkContainer
          metaJsonLdContainer
        }
      }
    }
  }
`

const IndexPage = ({ data }) => {
  const { posts, home } = data
  return (
    <main>
      { home && home.seomatic && (
        <Helmet>
          {parse(home.seomatic.metaTitleContainer)}
          {parse(home.seomatic.metaJsonLdContainer)}
          {parse(home.seomatic.metaLinkContainer)}
          {parse(home.seomatic.metaTagContainer)}
        </Helmet>
      )}
      <h1>Gatsby + Craft Blog</h1>
      <ul>
        {posts && posts.nodes && posts.nodes.map(post => (
          <li key={post.uid}>
            <Link to={`/${post.uri}`}>
              <h3>{post.title}</h3>
            </Link>
            <p>{post.excerpt}</p>
          </li>
        ))}
      </ul>
    </main>
  )
}

export default IndexPage
Great! Now let's flesh out the blog content.
Quick Word on Fragments
GraphQL queries can grow pretty fast, specially in the case of Craft and Gatsby. Fragments in Gatsby can come pretty handy when comes time to keep your code DRY, specially if you use common Fields in different Sections in Craft, like matrix blocks and cover pictures. Unfortunately, at the time of writing, we won't be able to use these fragments inside
gatsby-node.jsor with the Live Preview, but more on that later.
Adding Cover Picture 📸
Let's pull in the coverPicture to the PostsQuery in gatsby-node.js :
const result = await graphql(`
  query PostsQuery {
    posts: allBlogDefaultEntry {
      nodes {
          // ...
        coverPicture {
          ... on mainFileUploads_Asset {
            title
            url
            localFile {
              childImageSharp {
                gatsbyImageData(
                  width: 480,
                  height: 240,
                  quality: 80
                )
              }
            }
          }
        }
      }
    }
  }
`)
and in the ./src/templates/post.js:
// ...
import { GatsbyImage, getImage } from "gatsby-plugin-image"
// ...
const Post = ({ pageContext }) => {
  const { post } = pageContext
  const [coverPicture] = post.coverPicture
  return (
    <main>
      { post && post.seomatic && (
        <Helmet>
          {parse(post.seomatic.metaTitleContainer)}
          {parse(post.seomatic.metaJsonLdContainer)}
          {parse(post.seomatic.metaLinkContainer)}
          {parse(post.seomatic.metaTagContainer)}
        </Helmet>
      )}
      <Link to="/">
        <h3>Gatsby + Craft Blog</h3>
      </Link>
      <GatsbyImage
        alt={coverPicture.title}
        image={getImage(coverPicture.localFile)}
      />
      <h1>{post.title}</h1>
    </main>
  )
}
// ...
Neat! gatsby-source-craft gives us access to localFile that can return gatsbyImageData which can be piped right into GatsbyImage. Good job Craft Team!
Blocks 🧱
Finally we will implement the matrix blocks. First lets add our PostsQuery in gatsby-node.js :
const result = await graphql(`
  query PostsQuery {
    // ...
    contentBlocks {
      ... on contentBlocks_richText_BlockType {
        uid
        typeHandle
        body
      }
      ... on contentBlocks_picture_BlockType {
        uid
        typeHandle
        image {
          ... on mainFileUploads_Asset {
            url
            title
            localFile {
              childImageSharp {
                gatsbyImageData
              }
            }
          }
        }
      }
    }
    // ...
  }
`)
typeHandle it's what we are using to identify the block type so can render the appropriate component.
Let's create the following components:
./src/components/Craft/ContentBlocks/index.js
import React from "react"
import { RichTextBlock } from "./richTextBlock"
import { PictureBlock } from "./pictureBlock"

export const ContentBlocks = ({ blocks }) => {

  // Map block typeHandle with the proper component
  const components = {
    'richText': RichTextBlock,
    'picture': PictureBlock,
    'notFound': null
  }

  return (
    <div>
      {blocks && blocks.map( block => {
        // either load from typeHandle or 'notFound'
        const Block = components[block.typeHandle || 'notFound']
        // return block, if exists, with deconstructed props
        return Block !== null && <Block key={block.uid} {...block} />
      })}
    </div>
  )
}
./src/components/Craft/ContentBlocks/richTextBlock.js
import React from "react"

export const RichTextBlock = ({ body }) => {
  return (
    <div dangerouslySetInnerHTML={{ __html: body }} />
  )
}
./src/components/Craft/ContentBlocks/pictureBlock.js
import React from "react"
import { GatsbyImage, getImage } from "gatsby-plugin-image"

export const PictureBlock = ({ image }) => {

  const [ pic ] = image

  return (
    <GatsbyImage
      alt={pic.title}
      image={getImage(pic.localFile)}
    />
  )
}
Mapping the "Block" components to an object will allow us to easily add more block types in the future without breaking Gatsby, since it will only render mapped blocks. And it's more elegant than using switch statements.
Let's add ContentBlocks to the post.js template:
import React from "react"
import { Link } from "gatsby"
import { Helmet } from 'react-helmet'
import parse from "html-react-parser"
import { GatsbyImage, getImage } from "gatsby-plugin-image"
import { ContentBlocks } from "../components/Craft/ContentBlocks"

const Post = ({ pageContext }) => {
  const { post } = pageContext
  const [coverPicture] = post.coverPicture
  return (
    <main>
      { post && post.seomatic && (
        <Helmet>
          {parse(post.seomatic.metaTitleContainer)}
          {parse(post.seomatic.metaJsonLdContainer)}
          {parse(post.seomatic.metaLinkContainer)}
          {parse(post.seomatic.metaTagContainer)}
        </Helmet>
      )}
      <Link to="/">
        <h3>Gatsby + Craft Blog</h3>
      </Link>
      <GatsbyImage
        alt={coverPicture.title}
        image={getImage(coverPicture.localFile)}
      />
      <h1>{post.title}</h1>
      <ContentBlocks blocks={post.contentBlocks} />
    </main>
  )
}

export default Post
Let's take a quick inventory:
- We've created a fresh new Gatsby project
- We've queried Craft's content using gatsby-source-craft
- We've create home and blog pages, with proper seo tags from SEOmatic.
- We've implements matrix content blocks in a dynamic, flexible way.
Stay tune for Part 4, where we will bring Live Preview into focus.
